Showing posts with label guide. Show all posts

Thursday, June 14, 2018

Guide to hiking to the Mendenhall Glacier Ice Caves in Juneau, Alaska!

*** I added a video at the bottom! ***

Let me preface this article first with that I am by no means an expert!  I got lost a few times but eventually found my way.  I'm only writing this article as a tool to assist others in reaching the ice caves (though now melted).   You can read my article about the ices caves here.

If you're on this page, it's likely you've heard about or seen some photos of the Mendenhall Glacier Ice Caves.  They're a sight to behold!  But being made of ice, they do eventually melt which is the point of time we are at now.  That said, it's still worth the effort to hike to the... guess we'll just call it the front of the glacier.  For future reference, I'll refer to the ice caves as the glacier.

Getting to the trailhead:

I'm going to assume you can read a map but the main thing is getting on the Mendenhall Loop Road.  As you may have guessed, this road is a giant loop and when viewed on a map, the turnoff is roughly at the top, a little northwest.  You need to turn onto Montana Creek Road and follow it all the way to the end.  It turns into Skaters Cabin Road so don't make any turns off of the road.  Skaters Cabin Road dead ends at the West Glacier Trailhead. 

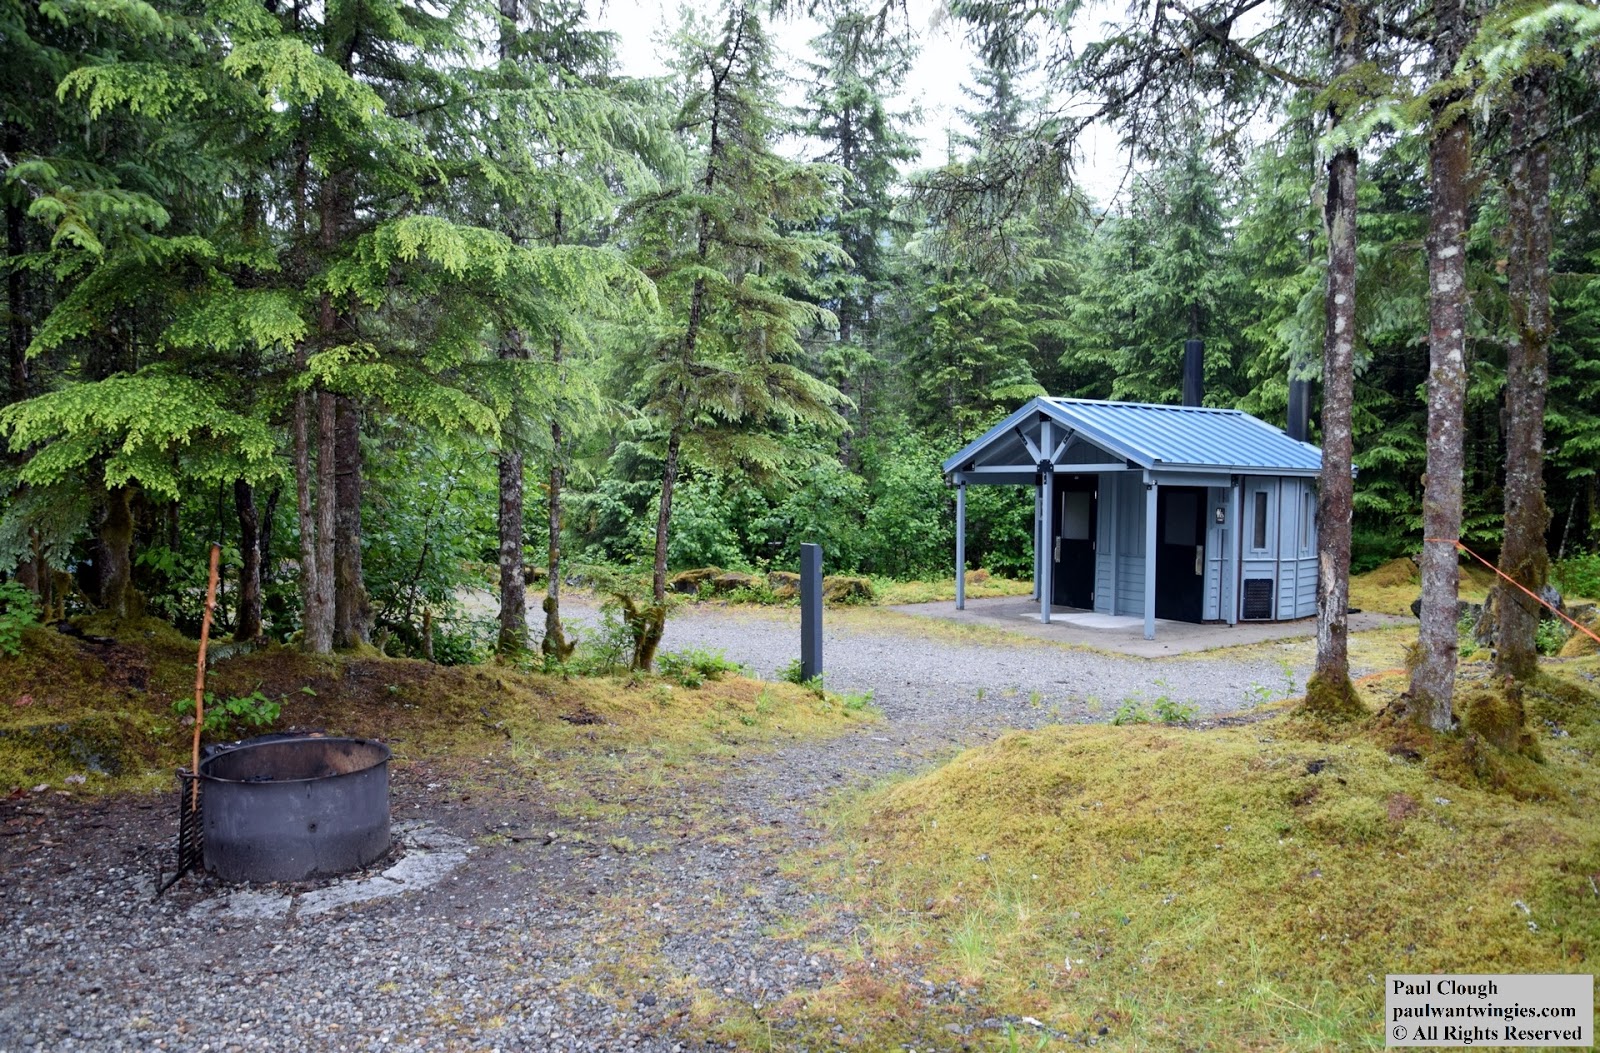
There are bathrooms but no running water. The trail entrance is to the left of the bathrooms.  About 100 feet in, you will find a trailhead board with information as well as a link to the USFS Map of the area.  If you have a smartphone with internet service, I'd advise downloading some sort of tracking app so if you get lost, you can backtrack.  There's also the 1910 cairn Marker which means at this point, the glacier was right where you're standing in 1910.  There will be many of these throughout the area, mostly near the lake.  A cairn is a marker made of rocks.  Some are official with the ice limit makers while others are merely there to mark the route.  

Hiking the trail:

The first 1.3 miles is fairly easy.  A few inclines and towards the end, you have a few steep inclines that zig zag.  There are cable hand rails but still be careful.  You will eventually reach a fork.  The sign below is located to the left of the trail.  


West Glacier Trail/View Point Cairn Fork Mid June 2018
West Glacier Trail/View Point Cairn Fork Mid June 2018

You have two options to get to the glacier.

The View Point Cairn Trail or the West Glacier Spur Trail. 

Both has advantages and disadvantages.  Looking at my GPS tracking log, they seem to be about the same length but the consensus is that the Cairn Trail is a bit shorter. 

West Glacier Trail:

First off, the West Glacier Trail goes on for quite a ways.  To the west of the glacier I'd imagine.  I missed the turnoff to the spur trail.  I'll come back to that in a minute.  Because I missed the spur, I ended up going up and up.  This however afforded me the nice view below. 


Mendenhall Glacier from West Glacier Trail Mid June 2018
Mendenhall Glacier from West Glacier Trail Mid June 2018

I was well into the "ribbon" section, I'll come back to that too, when I realized I was not on the spur trail so I back tracked.  I remember there being an obvious marker and sign but this sign has since been removed.  I was an idiot and forgot to take a photo but if you're using a GPS app, the spur should be about 2.1 miles from the trailhead.  You'll reach a viewpoint with a large 5 foot high boulder on the left.  The trail goes to the left and up but you'll notice a primitive trail that continues straight.  This is the spur trail.  There used to be a sign but it has been removed.  You can see the 2 bolts that held the sign so you'll know you're at the right spot.  From this point on, you're in the "ribbon" section.  This trail is not official like the West Glacier Trail.  This trail has been marked by guides and is fairly easy to navigate.  There are these colored plastic ribbons that are usually tied to trees and branches. The next one is usually in sight of the last one unless the trail is pretty obvious but you shouldn't go more than 200 feet without seeing one.

From the fork, you'll be looking for 2 main landmarks.  The large boulder which has a rope to help you up and down and the wood plank that crosses a creek.  Provided you pass these, you're on the right track.  From the plank, the trail gets a bit squirrely.  A lot of large flat rocks.  As you near the glacier, you'll have less vegetation until you reach the final embankment which is literally just a slope of loose rocks and gravel.  At this point, the route ribbons will be tied to rocks on the ground.  You will be at times sliding down so be very careful.  When you arrive at the bottom, you'll notice another trail.  That is the View Point Cairn Trail. 

The Glacier:

The first thing you'll notice is that it's dirty.  Nobody comes and cleans the damn glacier!  Okay, that's mother nature for you.  As I mentioned, the famed ice caves are no more.  I have the photo below which was taken last year around late June and below that is the photo I took this trip, mid June 2018.

Mendenhall Ice Caves Late June 2017
Mendenhall Ice Caves Mid June 2018
As you can see in the bottom photo, the caves have melted and the entrances are blocked.  Do NOT attempt to go in!  But it's amazing what a year does to this glacier. 

You can explore the seam but be careful.  What looks like openings are just small pockets.  Are there caves in there?  Maybe.  New caves open from time to time.  But for now, it's just a glacier. 

It's my opinion that it's easier to take the West Glacier Trail Spur to the glacier and the View Point Cairn Trail back. 


West Glacier Trail/View Point Cairn Fork Mid June 2018
Mendenhall Glacier from the View Point Cairn Trail Mid June 2018

View Point Cairn Trail:

From the glacier, it's a bit shifty.  Remember, this area was ALL under ice just a few years ago so little vegetation has grown.  As you start gradually ascending, there will be a spur trail to the left that leads to the lake.  This trail is mainly for kayakers and rafters who take the easy route.  Stay to the right and follow the ribbons.  You will pass many of the cairns (ice limit markers).  Maybe you'll find one with your birth year.  I did not.  There's a few 20 to 30 foot rock inclines you need to navigate.  Going back, you'll be going down.  Going to the glacier, you'll be climbing.  This route is a little more wet than the other route, at least this time around.  All in all, this trail stays close to the lake and at one point you'll be at the lake.  Then it goes up and up and up until you'll reach a USFS map sign like at the trailhead.  Go to the right and you'll intercept the main trail, then turn left to head back to the trailhead.

Map of hike:


Summary:


Is this hike worth it without the ice caves?  YES!  Even without the ice caves, it's still a beautiful, ever-changing piece of history that will not be here forever.  This is not a hike to do once but every time you visit Juneau.  While thousands and thousands visit the visitors center and nugget falls each day, very few actually get close enough to touch the glacier. 

Tips:

There are guides.  If you got the money, take one.  They also offer treks onto the glacier and when ice caves are available, into the caves. They provide all the necessary equipment. 

If you are stupid like me and go your own way, make sure you have the following:

Fully charged smart phone, ideally with 4G service.  Most cell phones do not have true GPS.  They still need the internet to download maps.  Download an app to track your route.  I used MapMyHike. 

Bring food and water.  At least 1 gallon per person and snacks that are high in protein.  Ideally, bring enough food for 2 meals.  If you get lost or stuck overnight, you'll need that food and water.

First Aid kit is a must

Bear spray is ideal but it's one of those things most tourists won't have because it's just a pain.  You can't take it on the plane so the likelihood you'll actually use it is low.  Check with your hotel or hostel.  They sometimes have loaners.

Layers of clothes, especially in the early and late seasons

Hard hat or helmet is good.  Good for cave exploration but also good for avoiding hitting your head on low branches. 

Gloves are great for grip and protection if you fall.  If you fall, chances are you'll land on your hands so gloves will save you from road rash. 

If you really want to get anal, you should have a paper map, a manual compass (or just a compass I guess), flash light, overnight survival gear, hiking boots and probably a few other things. 

Pay attention!  If you feel like you got off trail, especially in the ribbon section, STOP and backtrack to the last ribbon.  Carefully look for the next one.  Some are very small. 

Plan on at least 6 hours for an out and back trip.  It's roughly 3 miles each way. 

Summary again:

I hope this guide helps you and you read it before you head out, not when you're on the trail.  :)

Video:


~~~~~~~~~~~~~~~~~~~~~~~~~~~~~~~~~~~~~~~~~~~~~~~
Visit my and subscribe to my youtube channel!
Visit my ETSY shop!

All photos taken by Paul Clough.  
© All Rights Reserved.  Please contact for permission to use photos.

Monday, January 22, 2018

How to get cheap airfares and save money while flying

Virgin America Main Cabin Select Row 3
I had an empty row in Main Cabin Select on Virgin America.  Free upgrade due to Alaska MVP status.  A few passengers attempted to sit there but were asked for $150.  


I travel a lot and unlike the old days, flying is generally cheaper than the train or Greyhound.

While flying can be expensive, it all depends on how much you value your time.


1.  Be loyal to one airline -
If you're a frequent traveler, try to only fly on one airline and its codeshare partners.  In the long run, it could benefit you with elite status, upgrades to first class, free checked bags, priority boarding AND free flights.  But if you're just an occasional traveler or once a year, then the airline choice is not important.  But on that note, there are two distinct types of airlines.  Discount and legacy airlines.  Discount airlines like Spirit, Frontier, Allegiant offer rock bottom fares but charge for everything else like choosing seats, printing tickets, checked AND carry on bags and more.  However, even the legacy airlines like Alaska, American Airlines, Delta and United also charge for some of the aforementioned things but usually have better on time performance.  Most of the legacy carriers have introduced base tickets to compete with the discount airlines so be very careful when checking out so you can understand any possible fees you may encounter.
Southwest falls in the middle but ultimately comes down to how far in advance you can book.  While there's no fees for the first two checked bags, the lowest fares are released 6 months out and only go up.  If you travel last minute like me, Southwest will not work out most of the time but it's certainly worth a look.


2.  Don't check fares too much unless you're ready to buy -
Fares go up and down all the time and there's worse feeling than finding the fare you saw yesterday is now $200 more today.  But when you're ready, use an aggregator like ITA Matrix to find the lowest fares and also have a looksie at southwest as they do not publish fares on 3rd party sites.


3.  Book two one-way tickets -
Sometimes you can save money by flying on different airlines for each leg.  Also, should a problem arise and you need to change a date, both legs won't be affected.  Almost all fares carry large fees to change tickets (any change, date, name, time of flight) and in many cases, it's cheaper to buy a new ticket.  I have had to abandon many tickets but ultimately it was cheaper to just buy a new ticket. 


4.  Be flexible on dates and airports -
While this may not be practical for everyone, it can save a lot of money.  Departing on a nearby date can save a few dollars to hundreds of dollars.  Departing from a nearby airport can also save money.  If you won't be driving, you could depart and return from different airports for maximum savings potential.  Of course, there's risk involved with traveling to nearby airports as you still have to get to those airports.  Using a site like ITA Matrix by Google can allow you to search nearby airports up to thousands of miles which can be useful for international travel but could also allow you to visit other cities you have never been to.
Just remember direct flights generally cost more than connecting flights but that can always change.  Airlines lower certain fares on certain routes to balance out the flights so when there's an empty flight, that fare might go down and if there's a near full flight, the fare goes up.
This is also important for international travel.  Most direct flights operate once a day which means that there are limited seats to begin with.  If a connecting flight is offered, it will be routed on emptier flights.  You may add several hours of travel time but you might add several bills to your wallet.


5.  Sleep at the airport -
Again, not for everyone but sometimes the cheapest flights depart early in the morning or late at night and or arrive at odd hours.  I don't drive and rely on public transportation so this works out for me as it saves a night in a hotel.  Most airports are open 24 hours (ticketing and baggage area) and as long as you have proof of your ticket, you shouldn't be bothered.  Just keep your valuables secured.


6.  Volunteer to give up your seat -
Pack carry on only.  This may not work for everyone but this allows you to be more flexible and nimble in the event your flight is oversold.  You can get vouchers for future travel and occasionally cash for giving up your seat and taking a later flight.  Passengers with no connections and no checked luggage are chosen first as it's faster and easier for the airline to bump you.


7.  Check the calendar -
If you're finding the fares not to your liking, there may be a reason.  Check to see if there's a major convention in town, major sporting event or maybe it's spring break.  Know the times of the year when people travel. 3 day weekends, holidays, spring break, winter break and summer.  Try to avoid these times but if you must travel, book at least 3 months ahead.  Fares just go up during the high demand periods.  Just remember you're not the only one trying to go somewhere!


8.  Book directly through the airline -
While I do use ITA Matrix to locate my desired fare as it's very effective, I ALWAYS book through the airline directly.  Why?  Because there's less chance for errors, lost itinaries and fraud.  When you go searching all willy nilly for 'cheap airfare' and you find something that looks too good to be true, IT IS.  If you're a frequent flier member, you'll always want to book directly to ensure you're getting your benefits and earning miles.


9.  Be nice -
While this really isn't a tip to save money, it's just good manners and can go a long ways when your flight is delayed or cancelled.  Agents are much more willing to help you when you're polite and understanding.  Yes, they know it sucks to have the carpet pulled out from under you and you have a big meeting in Sausalito tomorrow but sometimes it's just out of their control and they will get you to your destination as soon as possible.  Ask if there's any other routes you could take, fee based seats such as preferred seating, premium economy or first class.  It might be easier to pay a small fee than wait.  Lastly, you could always throw in 'is rule 240 applicable?'  Rule 240 is an unofficial program that is still used by most airlines.  Simply put, it states that if your original flight is delayed and or cancelled and there's another airline with non-stop service that can get you there sooner than your airline AND there are open seats, your airline could put you on that flight.  There are a few more rules of course but if your delay is more the 3 hours, start tossing around rule 240.  Weather related delays and cancellations are not covered.  Also, there has to be another airline serving the exact same route.


Thanks for slugging through my ramblings and hopefully you found something that you could use.  With airlines merging and going bankrupt, it's becoming more of a sellers market, IE the airlines have you by the neck because there's few or no other choices.  It's a bummer because competition is good for the consumer.

Safe travels!

~~~~~~~~~~~~~~~~~~~~~~~~~~~~~~~~~~~~~~~~~~~~~~~
Visit my and subscribe to my youtube channel!
Visit my ETSY shop!

All photos taken by Paul Clough.  
© All Rights Reserved.  Please contact for permission to use photos.


Monday, December 4, 2017

Alaska Railroad - Aurora Winter Train

Alaska Railroad - Aurora Winter Train - Anchorage Depot - Photo by Paul Clough

My first trip to Alaska was in October of 2015.  I'm not precisely sure what made me want to go up and visit.  Perhaps it was knowing a friend who went up for a few seasons on the fishing boats or maybe it was all of the TV shows about Alaska.  The trip was last minute and I pretty much planned it as I went along.  One thing I knew I had to do was ride the Alaska Railroad.  I love riding trains whether it be getting around town or going cross country.  While Amtrak doesn't necessarily scream the glory days of train travel, the Alaska Railroad makes riding the train fun again.  Grant it not every train can have gorgeous scenery from end to end or be featured on TV shows, it's just great to ride as many trains as I can.  

I ended up planning my train trip towards the end of my visit and flying out of Fairbanks.  
The Aurora Winter Train only runs during the off season from late September to mid May. 
The northbound train leaves Anchorage at 8:30 AM and arrives in Fairbanks at 8:00 PM on Saturdays.
The southbound train leaves Fairbanks at 8:00 AM and arrives in Anchorage at 8:30 PM on Sundays.   
There are select midweek trips  towards the end of winter.  What makes this train unique is that it incorporates the Hurricane Turn train which is a route within the route that the train travels.  Normally, the Hurricane Turn runs in the late spring to early fall and the Denali Star (the main tourist train) bypasses the stops made by the Hurricane Turn.  I'll cover more of that later.  Currently, the one-way fare from Anchorage to Fairbanks is $195 for ages 12 to 64 and $98 for children and people 65 and older.  Additional discounts are available so check their website for details. 

From what I saw, most people who started in Anchorage where either flying back to Anchorage or flying home from Fairbanks with only a handful planning on taking the return trip either the next day or the following week.  There were some Alaskans just commuting outside of the flag stops.  This is actually a good way to plan your trip.  Fly into Anchorage, take the train to Fairbanks and fly out.  Or you can do it in reverse.  

I arrived at the Anchorage train depot around 7 am by taxi.  There's little traffic at that time on Saturdays so don't get there too early as there's not much to do.  After checking in and dropping off my pack, I debated buying a sweatshirt which I passed on and regretted until my next trip to Alaska.  I did however buy the guidebook which has the highlights of the entire Alaska Railroad line and mile marker info.  There were about 40 people leaving and I heard less than a dozen coming back from Fairbanks but this train operates no matter what as it's a lifeline for some people living along the route.  There's a coffee kiosk but they weren't open the time I went so if you need your morning coffee, get it before you arrive or wait until you board.


The consist of most winter trains are considerably smaller than the summer trains.  Due to the nature of the train, they don't want to pull more weight than needed so most trains have 2 locomotives, a dining car, 2 Adventure Class (coach) cars and a baggage car.  They try to keep the through passengers in the car closest to the dining car and Hurricane Turn passengers in the car closest to the baggage car though depending on the loads, they can mix the cars.   Sorry, no dome cars or the famous Gold Star service or anything fancy on the winter train. Like all Alaska trains, there are no sleeping cars or private cabins.  Seating is assigned and if it's not busy, you should get your own row.  The seats are pretty standard like on Amtrak but no tray tables.  The windows are large but there can be glare for taking photographs through them. 

Once we we underway, it was only minutes before we were "out in the wilderness!"  Being early October, it was just about daylight and looking to be a very nice day.  

There's open windows in the vestibules in-between cars which allow glare-free photos and a breath of fresh air.  The temperature difference can be pretty wide between Anchorage and Fairbanks so have some extra layers available in your carry on.  Like most trains, you can walk around as much as you need although on this train, there's only three accessible cars.  The dining car has table service dining and there's also a quick service counter for snacks and beverages.  Alcohol is also available.  They do not accept cash on-board, only debit or credit cards.  You can purchase a meal voucher at the train station for cash before leaving.

Unlike the summer train (Denali Star which makes only a few stops), the winter train makes many stops.  The first stop is Wasilla, which contrary to popular belief, does not have a view of Russia.  It's a small town and the stop is fast.  The next stop is Talkeetna which is smaller but has more people using the train.  Talkeetna is where the Hurricane Turn portion of the route starts which means that the train makes "flag" stops.  Many people live along this portion of the route and the tracks are their only source of transportation so the railroad is like a road and they just stand out there and flag the train down.  To get off, they just say which mile marker they need off at.  This is also the case for deliveries.  Some folks have supplies delivered.  You'll see many of these people with lots of cargo and supplies.  The flag stop passengers usually ride in the rearmost car so they can access their baggage.  Talkeetna is also a large base for tourists who want to flight-see to Denali and hike and camp along the Hurricane Turn area.

We made several flag stops and rumor has it, a homesteader from the show Railroad Alaska was on the train.  Each flag stop was short, just long enough to offload the passengers and their luggage.  There are several official stops along the Hurricane Turn, mainly for backpacking and skiing. The pinnacle of the route is crossing the Hurricane Gulch Bridge in Hurricane Gulch Alaska.  The train stops for photo opps then continues towards Denali.  Speaking of stopping, the crew do a nice job of pointing out wildlife and stopping when possible. You have to have an eagle-eye to spot a bald eagle or a bear but they're out there!  If you're serious about trying to photograph some wildlife, you'll need a long-range lens, at least 300mm. 


What impressed me the most was the constant changing of the landscape.  People (including myself) were just clicking and clicking and before long, I was photo'd out.  But I just love watching the ever changing scenery go by.  Again, we ended up having a beautiful day but that will not always be the case.  Obviously, Alaska does get a lot of snow and the train runs pretty much no matter what so you'll never know what you'll see.  I heard the weekend before was snowy and completely cloudy so I was fortunate for the weather we had.

We made a quick stop in "Honolulu" Alaska which is just a cheeky sign but we were able to get off and some people had a snowball fight.  It was a nice break to get out and stretch. 

By late afternoon, we arrived at the Denali National Park station.  While the area is technically closed during the off season (all of the hotels are closed), you can get off if you have other arrangements as the actual park is open year-round.  Also, there are some staff who maintain the hotels during the off season and we had one get off.  Leaving the station gives you a great view of the resort village as its known before twisting and turning towards Healy.  At this point, I was pretty tired of taking photos and grabbed a beer from the dining car and watched the final rays of light shine down over the Tanana River in Nenana.  You'll get a lot of commentary from the conductor throughout the trip which can be a plus or a minus depending on how much you want to know.  But I found the tidbits interesting like the military base in Clear which is an early warning radar station.

We arrived in Fairbanks right on schedule.  It takes a few minutes to get your checked luggage so it's a good time to make sure your transportation is there.  I was staying at the Super 8 which occasionally has a shuttle but if no shuttle driver, they'll pay for a cab.  Most other hotels in town also provide shuttles to the train depot as well.  It's a long train ride but definitely relaxing if you're not in a hurry.  I still feel that riding the train at least once in Alaska is a must do.  It's not meant to be fast.  Please enjoy some of my photos below and plan your trip to Alaska!
   
Alaska Railroad - Aurora Winter Train - My ticket to Alaskan Adventure! - Photo by Paul Clough

Alaska Railroad - Aurora Winter Train - Passenger Car 210 - Photo by Paul Clough

Alaska Railroad - Aurora Winter Train - Interior of Passenger Car 210 - Photo by Paul Clough

Alaska Railroad - Aurora Winter Train - Watching the world go by - Photo by Paul Clough
Alaska Railroad - Aurora Winter Train - Talkeetna - Photo by Paul Clough

Alaska Railroad - Aurora Winter Train - Adventure Class - Photo by Paul Clough

Alaska Railroad - Aurora Winter Train - Mountains and ponds - Photo by Paul Clough


Alaska Railroad - Aurora Winter Train - Mountains and snow - Photo by Paul Clough

Alaska Railroad - Aurora Winter Train - Cold Selfie - Photo by Paul Clough


Alaska Railroad - Aurora Winter Train - Turing and Twisting through Alaska - Photo by Paul Clough

Alaska Railroad - Aurora Winter Train - Honolulu... Alaska - Photo by Paul Clough

Alaska Railroad - Aurora Winter Train - Mountains and Snow - Photo by Paul Clough

Alaska Railroad - Aurora Winter Train - Hidden lakes - Photo by Paul Clough

Alaska Railroad - Aurora Winter Train - Mountains, lake, reflection - Photo by Paul Clough
Alaska Railroad - Aurora Winter Train - This is what comes to mind when I think ALASKA - Photo by Paul Clough

Alaska Railroad - Aurora Winter Train - Denali National Park resort village - Photo by Paul Clough

Alaska Railroad - Aurora Winter Train - Leaving the mountains behind - Photo by Paul Clough

Alaska Railroad - Aurora Winter Train - Nearing the Mears Memorial Bridge in Nenana - Photo by Paul Clough
Alaska Railroad - Aurora Winter Train - Nearing the Mears Memorial Bridge in Nenana - Photo by Paul Clough

Oh, an I made a video, pretty crummy quality but hey.


You can view full details and book your trip on Alaska Railroad's website.
https://www.alaskarailroad.com/ride-a-train/our-trains/aurora-winter


~~~~~~~~~~~~~~~~~~~~~~~~~~~~~~~~~~~~~~~~~~~~~~~
Visit my and subscribe to my youtube channel!
Visit my ETSY shop!

All photos taken by Paul Clough.  
© All Rights Reserved.  Please contact for permission to use photos.


Saturday, August 12, 2017

Mendenhall Campground Backpacker Loop - Site B29

Site B29 at the Mendenhall Campground Backpacker Loop is towards the end of the loop.  It seems to have an irregular tent pad compared to other sites.  It is also fairly close proximity to site B28 but there's a little tree spacing.  This site is nearest the water spigot so you may hear lots of foot traffic.  This is in a low lying area so it can flood.  There's typically pools of water near one or more sides so mosquitoes are more abundant.  


Entrance to site B29 at Mendenhall Campground

View from tent pad of B29 at Mendenhall Campground

View of water on one side of B29 at Mendenhall Campground
View information for campsites: B23 - B24 - B25 - B26 - B27 - B28 - B29

~~~~~~~~~~~~~~~~~~~~~~~~~~~~~~~~~~~~~~~~~~~~~~~
Visit my and subscribe to my youtube channel!
Visit my ETSY shop!

All photos taken by Paul Clough.  
© All Rights Reserved.  Please contact for permission to use photos.

Mendenhall Campground Backpacker Loop - Site B28

Site B28 at the Mendenhall Campground Backpacker Loop is at the end of the loop.  It's within direct sight of B27 so unless you're part of a group using both B27 and B28, it could be uncomfortable knowing B27 can look over at you all day. It's also very close to B29 but there's a tad more tree spacing.  It's close to the river so the roar of the water could be a problem if the sound of water makes you pee.


Entrance to site B28 at Mendenhall Campground

View of B27 from B28 at Mendenhall Campground

View of main path from tent pad of B28 at Mendenhall Campground

View of water on one side of B28 at Mendenhall Campground

View from entrance to B28 at Mendenhall Campground
View information for campsites: B23 - B24 - B25 - B26 - B27 - B28 - B29

~~~~~~~~~~~~~~~~~~~~~~~~~~~~~~~~~~~~~~~~~~~~~~~
Visit my and subscribe to my youtube channel!
Visit my ETSY shop!

All photos taken by Paul Clough.  
© All Rights Reserved.  Please contact for permission to use photos.

Mendenhall Campground Backpacker Loop - Site B27

Site B27 at the Mendenhall Campground Backpacker Loop is at the end of the loop.  It's within direct sight of B28 so unless you're part of a group using both B27 and B28, it could be uncomfortable knowing B28 can look over at you all day.  It's close to the river so the roar of the water could be a problem if the sound of water makes you pee.


Entrance to site B27 at Mendenhall Campground

View towards B26 from B27 at Mendenhall Campground

View of river from B27 at Mendenhall Campground

View from tent pad of B27 at Mendenhall Campground

View of B28 from B27 at Mendenhall Campground
View information for campsites: B23 - B24 - B25 - B26 - B27 - B28 - B29

~~~~~~~~~~~~~~~~~~~~~~~~~~~~~~~~~~~~~~~~~~~~~~~
Visit my and subscribe to my youtube channel!
Visit my ETSY shop!

All photos taken by Paul Clough.  
© All Rights Reserved.  Please contact for permission to use photos.

Mendenhall Campground Backpacker Loop - Site B26

Site B26 at the Mendenhall Campground Backpacker Loop is towards the end of the loop.  It's set back from the pathway so there's some privacy.  It's close to the river so the roar of the water could be a problem if the sound of water makes you pee. 


Entrance to site B26 at Mendenhall Campground

View from tent pad of B26 at Mendenhall Campground
View information for campsites: B23 - B24 - B25 - B26 - B27 - B28 - B29

~~~~~~~~~~~~~~~~~~~~~~~~~~~~~~~~~~~~~~~~~~~~~~~
Visit my and subscribe to my youtube channel!
Visit my ETSY shop!

All photos taken by Paul Clough.  
© All Rights Reserved.  Please contact for permission to use photos.

Mendenhall Campground Backpacker Loop - Site B25

Site B25 at the Mendenhall Campground Backpacker Loop is midway down the path.  Traffic noise from the main road is minimal.  You may occasionally hear the clanging of the trash bin lid.  B25 is directly across from the restrooms so the clanging of the doors could be a problem.  It is also open to the pathway which means anyone walking down the path can see into your site.  B25 is also within site of B23 so your neighbor could see what you're doing somewhat.  I spent 6 nights at this campsite and was fairly satisfied.  I was pretty paranoid of bears so seeing people walk by every so often was pretty comporting as they would get mauled before me, theoretically.


Entrance to site B25 at Mendenhall Campground

View from tent pad of B25 at Mendenhall Campground

View of B23 from B25 at Mendenhall Campground
View information for campsites: B23 - B24 - B25 - B26 - B27 - B28 - B29

~~~~~~~~~~~~~~~~~~~~~~~~~~~~~~~~~~~~~~~~~~~~~~~
Visit my and subscribe to my youtube channel!
Visit my ETSY shop!

All photos taken by Paul Clough.  
© All Rights Reserved.  Please contact for permission to use photos.

Mendenhall Campground Backpacker Loop - Site B24

Site B24 at the Mendenhall Campground Backpacker Loop is close to the main road so the traffic noise could be bothersome.  It is also next to the only trash bin in the area so the clanging of the lid could also be a concern.  There's also an auto site behind but with some trees and spacing but a noisy group could bleed over.  B24 is also near the restroom so the clanging doors could be an issue if crowded.


Entrance to site B24 at Mendenhall Campground

View from the tent pad of B24 at Mendenhall Campground
View information for campsites: B23 - B24 - B25 - B26 - B27 - B28 - B29

~~~~~~~~~~~~~~~~~~~~~~~~~~~~~~~~~~~~~~~~~~~~~~~
Visit my and subscribe to my youtube channel!
Visit my ETSY shop!

All photos taken by Paul Clough.  
© All Rights Reserved.  Please contact for permission to use photos.